Posts

Showing posts from March, 2018

Cool Tool Review #5 Slate Box
Image
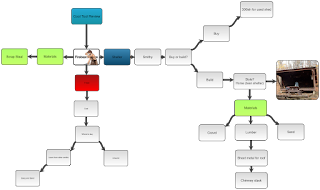
Hello all, My 5th and final cool tool review is on Slatebox. Slatebox is another concept mapping tool similar to the Coggle tool that I previously reviewed. Only better. Personally I found it to be a little more user friendly than Coggle and its free version offers a little more. For one you can embed a file into the nodes or bubbles. When you do this it offers a search function that allows you to search the internet for images to use and all you have to do is click the image and it is immediately embedded in the node. It also has a feature that allows you to link nodes to each other. This link when pressed takes you to the other node regardless of where it is on the concept map. Like Coggle, it can be used in classrooms to help students with brainstorming ideas for projects or papers. Where I feel it differs from Coggle the most is in its presentation capability. In Coggle presentation is a little stiff. In Slatebox having the ability to jump between nodes with a mouse click quick

Cool tool review #4 Loupe Collage

Hello all, For my fourth cool tool I chose Loupe Collage. Loupe Collage is a photo tool that takes your picture and, with your input, arranges them into various collage designs. They can form numerous predetermined shapes with the photos such as hearts, stars, and even minions. It allows you to make custom shapes as well. In a school setting, Loupe Collage would be very useful for yearbook and art classes. Many of the collage designs on the website are similar to designs used in my own yearbook. Loupe Collage would also make senior presentations easy and unique.  It is incredibly easy to use. Once you click the link you are taken to the creation page where you can immediately login from numerous different apps to access your photos. Once there, you chose your photos and the design you want them to replicate. That's it. From there you can make it more complex by adding borders and changing effects on the photos. It can be found here. http://www.getloupe.com

Major Project #3

Image
Hello all, This time I've got the pieces of the forge laid out and am taking you through them and explaining what they do. In an earlier blog post I called the part that feeds oxygen to the fire a "tue iron." That was incorrect and came from me misunderstanding the people who were telling me about it. It is called a  tuyère and is pronounced similar to "tue iron." Enjoy!

Major project #2

Image
Hello again, Long time no see! This time we are looking at some work I've been doing to get the forge up and running. First step, learn how to weld. Disclaimer: I have never welded before. As expected the results of my first time welding were pretty hideous but I have since watched numerous YouTube videos and have talked with a few coworkers that have experience in welding. My next attempt will hopefully yield better results. Attached is the first attempt. Enjoy!

Major Project Post 1 Forge Design

Image
Hello again, For my major project I chose to use my return to the hobby of being a blacksmith and document my journey and progress. I started smithing in high school with a friend of mine. Unfortunately then my short attention span got the better of me and I moved on. Ever since then I have often wanted to go back to it. So here I go. Forging metal into desired shapes requires only 4 things: the metal to shape, something to hit it with, something to hit it on, and something to heat it up with. Fortunately, I already have an anvil and a few hammers laying around and a few pieces of high carbon engine parts that are good scrap to start with. So, the only thing I lack is the heating element. First, I had to decide whether I wanted to use solid fuel (coal/coke) or gas. For familiarity and maybe a little nostalgia, I chose to go with a coal/coke forge. Additionally, rather than buy it I decided to make it. I'm using a side blast design with a water cooled tue iron. I got the des

Cool Tool Review #3

Hello again, This week I chose Camtasia. Which, if you go to their website , says that it is a screen recording and video editing software. You can download it and start working with a free 30 day trial if you wish to own it it'll cost you a whopping $169.00 for a single user license for educators. That's a little pricey for me so I think I'll enjoy using it until the trial runs out. Camtasia, as it says allows you to record what you do on your computer screen then edit into a video format with several different effects, sound clips, animations, clip art, and much more. It comes stocked with several basic medias and allows you to import your own to use. It is a little complex but offers several tutorial videos that help to make it simple. In a classroom setting I can see it being very useful for blended learning sessions, homework assignments, and even lesson plans for when the teacher needs a substitute. Teachers can go through a homework assignment prior to assignin

Blended Learning

Hello again, This week's topic was blended learning. Blended learning is something that, to a degree, has been done since the beginning of teaching. Personal research outside of the classroom technically could be called blended learning. Everything from reading a book to working on the farm could fall under the umbrella of blended learning. But blended learning most commonly refers to the practice of using traditional teaching methods such as lecture, modelling and scaffolding and including sessions of online learning either in the classroom or at home. It places more responsibility on the students and allows for a student driven learning environment which studies have shown drastically improve learning and test scores. In my school, we have blended learning options in all of our core classes. I am a substitute teacher, however, due to our lack of staff, I have been appointed the position of mentor and have my own classroom with assigned classes. For my classes, since I have re

Witty Comics a Cool Tool Review #2

The tool I chose for this week is Witty Comics . Witty Comics, as you may have guessed, is a comic strip building website. It allows you to customize each frame with different backgrounds, people, and speech and thought bubbles. From the get go I felt like this tool would be perfect for foreign language classes. In fact, in about 5 minutes I made a comic illustrating a man finding a coffee shop and ordering coffee. While it may have other uses in the classroom such as making a Powerpoint presentation more entertaining or perhaps illustrating an idea in a packet of work, I feel it is most useful in a foreign language dialogue situation. It could be a blended learning assignment for the student to go on and create a comic or two using key vocabulary from that week's classes. It is extremely easy to use. The only current drawback I see is that, even though I followed the sign up instructions, it has not let me login to actually view the website from a member standpoint. Unfortunatel